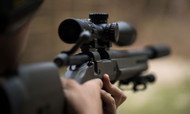
Zeroing Your Scope: A Simple, Step-by-Step Guide to Achieving Perfect Accuracy with Your Rifle
Posted by Arms Protection on Nov 7th 2025
Zeroing your scope is the critical process of aligning your rifle's point of aim with its point of impact. Without a properly zeroed scope, even the most expensive Rifle and highest quality Ammunition will shoot inaccurately. This guide will walk you through the simple steps to achieve perfect accuracy and confidence with your setup.
What is Zeroing and Why Do You Need It?
Zeroing ensures that when your reticle is placed on a target, the bullet will hit that exact spot at a specific distance—typically 100 yards for most centerfire rifles. Gravity and barrel harmonics cause a bullet to drop and drift, and zeroing compensates for these factors by mechanically adjusting your Scopes.
Preparation: Tools and Setup
Before heading to the range, gather the following:
- Your rifle and scope, properly mounted with secure Rings/Mounts/Bases.
- Plenty of the exact Ammunition you plan to use permanently.
- A sturdy shooting bench or bipod and sandbags to eliminate human error.
- A target set up at your chosen distance (100 yards recommended).
- Target Equipment like spotting scopes or binoculars to view shots.
- A notepad and pen.
Step 1: Initial Alignment (Bore Sighting)
Bore sighting gets you “on paper” quickly, saving time and ammunition. You can do this with a laser or optical Bore Sighting Tool, or manually:
- Place the rifle securely on the bench.
- Remove the bolt (or open the action) and look through the barrel from the breach end.
- Move the rifle until the center of the target is visible exactly in the center of the bore.
- Without moving the rifle, look through the scope.
- Adjust the scope’s windage (side-to-side) and elevation (up-and-down) turrets until the reticle is centered on the same point on the target as the bore.
Your first shot should now be close enough to hit the target at 100 yards.
Step 2: Firing the First Group
Fire a three-shot group, aiming carefully at the center of the target. Do not adjust your aiming point between shots. Take your time to ensure consistency, allowing the barrel to cool between groups if necessary.
Step 3: Calculating and Adjusting
After your first group, use your spotting scope or binoculars to locate the center of the group (the average point of impact, or POI).
- Determine how many inches the center of your group is off from the bullseye (Point of Aim, or POA).
- Look at your scope’s turret markings. Most scopes adjust in Minutes of Angle (MOA) or milliradians (mil). At 100 yards, a scope with 1/4 MOA clicks means four clicks move the POI one inch.
- To find the total clicks needed, use this simple formula:
Clicks = (Distance Off in Inches) x (Clicks Per Inch at 100 Yards)
- If your group is 4 inches low and 2 inches left, and your scope is 1/4 MOA:
- Elevation: 4 inches low x 4 clicks/inch = 16 clicks UP.
- Windage: 2 inches left x 4 clicks/inch = 8 clicks RIGHT.
- Make the calculated adjustments to your turrets.
Step 4: Confirming the Zero
Fire a second three-shot group at the bullseye. This group should be very close to the center. If it is still off by a small amount, repeat the adjustment process in Step 3 until your three-shot groups consistently hit your Point of Aim.
Step 5: Final Steps
Once you are satisfied with your zero, you can ‘reset’ your turrets to show '0' without affecting the internal alignment. This is typically done by loosening a set screw or lifting the turret cap. This ensures that if you dial in adjustments for longer distances later, you can always easily return to your 100-yard zero.

